Here is a list of the features that require the user login:
- Appointment
- Commerce
- Contest
- Discount
- Fanwall
- Inbox
- Job
- Loyalty Card
- Newswall
- Padlock
- QR Coupons
- Scratch Card
The Offline Mode is not really a feature, but it allows your users to download the contents of the app in their phones so that they can access it later, even if they have no connection. Let’s see how this works.
When the users download the app and open it for the first time, they will be asked if they want to download the contents to access it when they are offline. If they do it, they will be able to access all the contents that are in the app even when there is no connection.
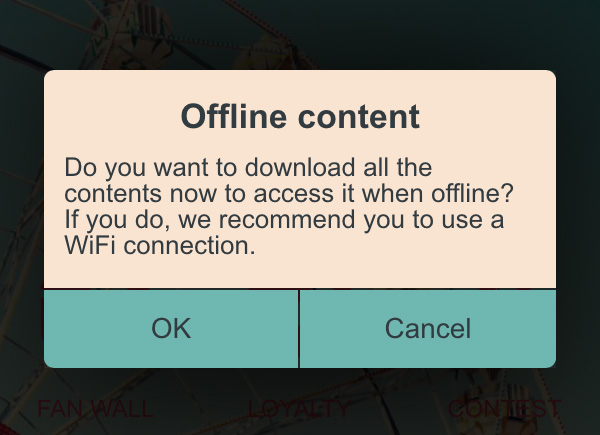
But you have to know that everything that is linked to an external website will not be downloaded, like for example Youtube videos, Instagram galleries, or Facebook pages. As you have to get the content from outside the app, you need an internet connection to access it.
Available features:
Author: support
Last update: 2018-09-07 15:38
With this feature, you will be able to create a list of geolocated places.
It will display all the places on a map, or, if the user opens the sheet of a particular location, he will be able to get the path and directions to this location, by walking or driving. The listing of the locations is sort according to the distance between the locations and the user, from closest to farthest.
After having added the feature to your app, click on the “+” to add a place to the list.
You can add an image that will be displayed in the list for this location, a title, and a subtitle:

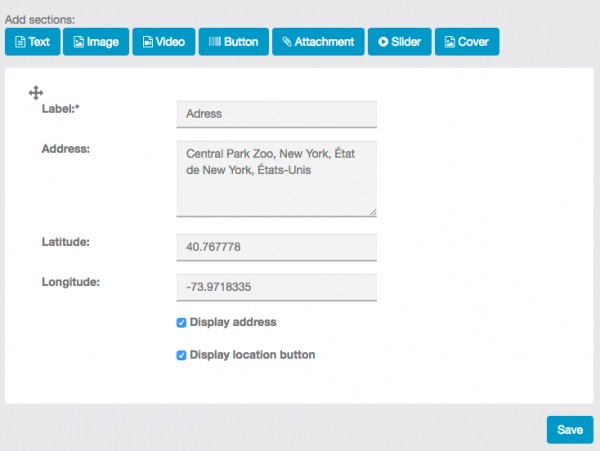
Then, you have to enter an address for this location, or its coordinates. You can add a label for this address but it’s not mandatory.
If you check the “Display address” checkbox, the address will be shown in the sheet of the location. If you check the “display location button” checkbox, it will display the button that will allow the user to see the path to this location.
Then you can add other sections like text + image, photo gallery, videos, cover. These sections are the same than in the Custom page feature, thus you can take a look to our support article about the Custom page feature to see how it work, click here. You can also add touch to call buttons, or web links buttons.
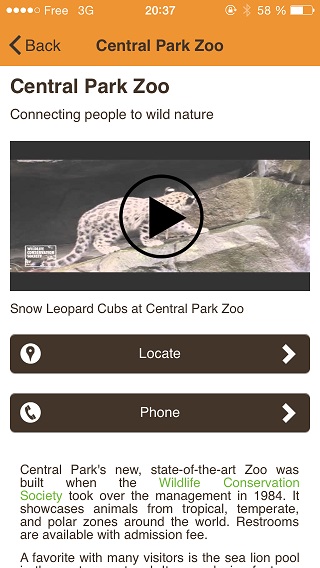
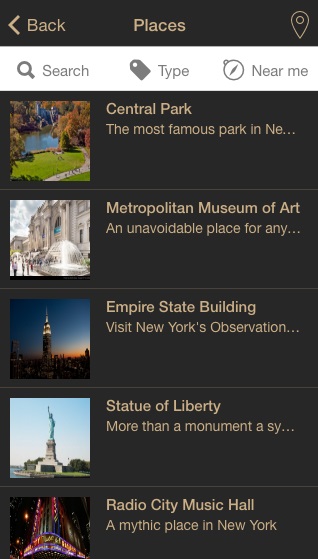
Once you have set up the list, it could look like that:
The list:

The location sheet:
You can also add a search tab in the feature. You can search your different points of interest based on four types of search:

Just check the search filters which should be displayed in your app.
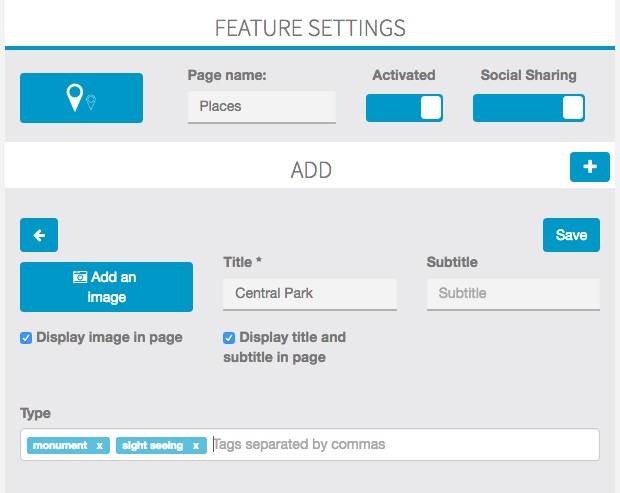
For the “Type” search, you have to add tags to your points of interest which will be displayed when you search by “Type”:
Finally, here is the result inside the app:
Author: support
Last update: 2018-11-05 10:36
ABCApp gives you a wide choice of features to put your products and activity forward.
Custom page allows you to enlighten your business by numerous ways. You can write an article with a picture or not, you can publish a photo gallery, you can publish a video directly on this page, and you can add “one touch call” buttons or link to any external website.
For instance, custom page gives you the opportunity to create pages.
Let’s see, how to create a page such as these ones. First, you need to create a new Custom page:

Then you must name your new page (here it will be Our Activities).
A custom page is made up of independent blocks. Thus you can realize as many blocks as you want in the same page (in the example page “Our Activities” there are three blocks: one about golf, one about tennis – which are both text sections – and one about the lake which is an image section).
Here, we will create the first section, which is dealing with golf. To do this, click on “Text”. A new text document appears and you can write your article in it.

Then, insert the picture we want in this section. To do that, click on the icon which is circled in red. This icon appears " Add a picture" and allows you to insert your picture.
When this one has been inserted, you can act on its alignment and its size:

Thus you obtain this result:

To obtain a section like “The vines”, click again on "Text" and follow the process we have seen. But you must act on the alignment which must be on the left and not on the right. You can realize as many sections as you want (custom pages are made up of independent blocks).
You can also add in your text element a link to a website or an e-mail address.
This appears:

You have to choose the link type you want to integrate, “URL” if you want to integrate a website or “E-mail” if you want to integrate an e-mail address. Then write in the URL case the link.
ex:
Website:

Creating a photo gallery is as easy as realizing a text section. To do that, click on "Image" and then on “Add pictures”.
You obtain this:

You can add a description of your picture if you want. Here again you can realize as many sections as you want, you just have to click on "Image".
The creation of a video section is as easy as the creation of text sections and picture sections. To do that, you must create a new section, click on "Video". This appears:

Click on "Youtube". This appears:

Enter your research or your YouTube URL in the field. Here I enter “Freeride in Sweden” and then click on OK. This appears:

Select the video you want to integrate and then click on “Save” to save your video.
Click on "Podcast". This appears:

Click on "My Video". This appears:

hus, to include a video, you have to write the URL address of your video in “Video URL”.
Once you have written the URL address of your video, you can write a little description of it and add a loading picture. To add a loading picture, click on "Loading picture". You obtain this:

Thanks to this section you can add a button to locate any place from the user device.
You can add a button to make a call, or a button to open a website.
Thanks to this section you can add files to this page (e.g: PDF files, etc…)
You can create a slider by adding several pictures.
Thanks to this section you can add cover to this page.
Author: support
Last update: 2018-11-05 10:47
The Folders feature allows to create an arborescence inside your app.


To create a folder, click on "Folder" in the “add pages” part. This appears:

First of all, you have to give a name to the root folder. To do this, click on + to add a folder. This appears:

For each folder, you can add a picture and a subtitle. Here is an example:


Note: You can ONLY add to your folders the pages you have already created. The folders page only enables you to classify your pages.
Adding a page to one of your folders is very easy. First: select the folder in which you want to add a page and then click on the page you want to add. For example “Hosting”:
“Hosting”
Then click on the page you want to add to this folder.

Here we are. We have added our first page to a folder. Do the same for each page you want to add. Here is an example of what you can create :

You will see that, once you have added a page to a folder, this page will not appear anymore in the main feature slider. To manage the pages you have added on some folders, you have to open the Folders page. To do this, follow this process:- In the main feature slider click on the root folders icon you built/
– Select the folder or the subfolder in which the page you want to manage is.

– Click on the page you want to edit. For example, here we are going to click on “Custom Page”.

– Once you have clicked on the page, you can edit it.
– To go back to the root folder, click on the icon of the page you have just edited.

– If you want to go back to the main feature slider, click on “Main”

Once you have classified a page into a folder, you still have the possibility to remove it from the folder.To do this click on the cross:

Author: support
Last update: 2018-11-05 10:04
This functionality allows you to create links to a feature in your app from another feature.
From the feature places , custom page :
In CK editor (text editor) there is a new button :

To open the menu from source code , click on the insert in-app link button :

Once you have clicked this button , a new menu pops up :

Select the feature you want to link, press ok and it’s done !
Author: support
Last update: 2017-04-24 09:51
With the Commerce feature you will be able to sell your products from one or several points of sale. Users will be able to pay online via Paypal, or to pay at your point of sale or when they are delivered.
Let’s go!
After adding the Commerce feature to your app, click on "+" to add a point of sale :

Then fill out with your store info:

Then add your delivery options. You can choose from:
If you choose “Delivery”, some other options are displayed:

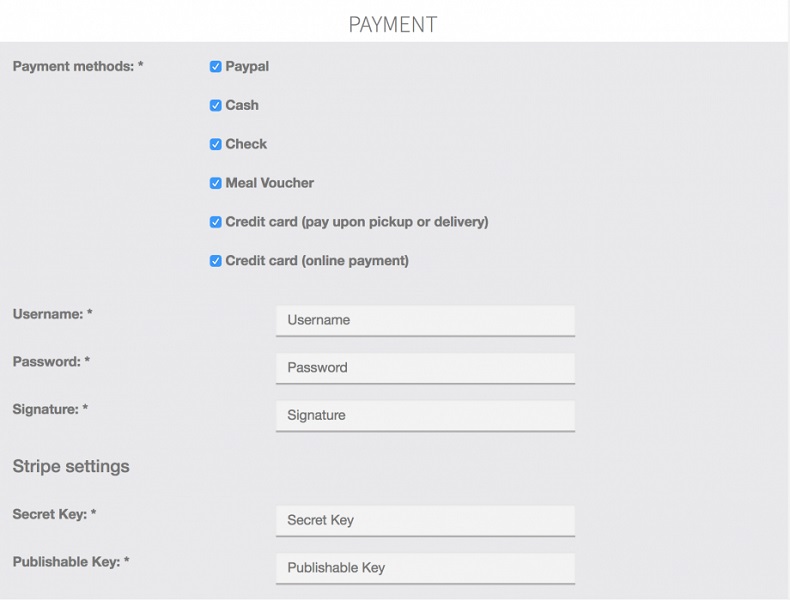
Then add your payment options. If you choose Paypal, you’ll need to do some mandatory operations in your Paypal account, click here to see how you have to set up your Paypal account to enable it in your app. You can also pay by credit card when you pick up your order / upon delivery or you can directly pay by credit card online. To do that you just have to select the option “credit card (online payment)” and fill out the two sections “Secret Key” and “Publishable key” you obtained on Stripe. If you don’t know these keys, just check out this page to know how to get them.
Save by clicking on "OK"
Then go in “Catalog” and click on “Categories”:

Click on “+” to add your categories.
A first one is automatically created but won’t be shown to users. It’s your root category but once again it will not be shown to users so you can leave it like that. Select it and click on “+” to add a subcategory (in fact, as the root category is not shown, this new category will be a main category). Add as many categories and subcategories as you need:

Then click on “products” from the main menu in “Catalog”.
Click on “+” to add a product. And fill out with your new product info. Add as many photos as you wish.

You can some sizes to your product. Switch on Product Formats and then fill out sizes information of your product, with a price for each size. Note that if you activate this function, you won’t be able to change the price of your product in the main menu as you did just before. The price displayed in the app will be the smallest one (“from 3€” for example).

You can also add some options to this product. By options we mean sauces, complementary products, etc.
Here is an exemple with some sauces.
First, create a new options group:

If you check “at least one option is required” the user will have to choose from the sauces you offer when he orders the product. He will not be able to order without choosing one of these options (that’s useful when you have many sizes for a product, as we will see next).
Then, in the “Add it options” section, click on “+” to add options to this group of options.
Click on “OK” to save.
Now, in your product details page you can see your options below.

Then check the categories for your product:

And click on “OK” to save your product.
You can also duplicate a product if you want to create a new product that doesn’t have many differences from another one.

If you have many products in the feature, it can be difficult to scroll to find the one you are looking for. That’s why we implemented a search bar, where you can type its name and find it easily.

In the “Orders” menu, you will be able to see and manage the orders you receive.
In the “Settings” menu, you will able to manage the fields required during the order. You can either choose to make a field mandatory, hidden, or simply hide it from the form. Let’s look at an example:

And let’s see the result inside the app when ordering:
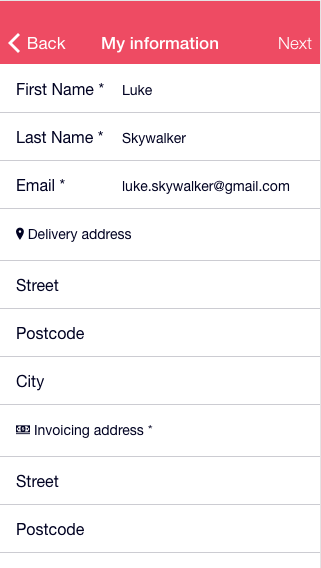
Furthermore, if the user has already created an account in the app and is logged in, some information will automatically be retrieved by the MCommerce feature to fill parts of the form, as you can see in the example above.
You will also be able to link, for each store, a connected printer to your app to print orders when they arrive, and also to manage your tax rates if you have several:


You’re done!
Author: support
Last update: 2018-11-05 10:10
With the Twitter feature you will be able to include your Twitter account in your application.
To get Twitter Access keys, you need to create a Twitter Application which is mandatory to access Twitter.
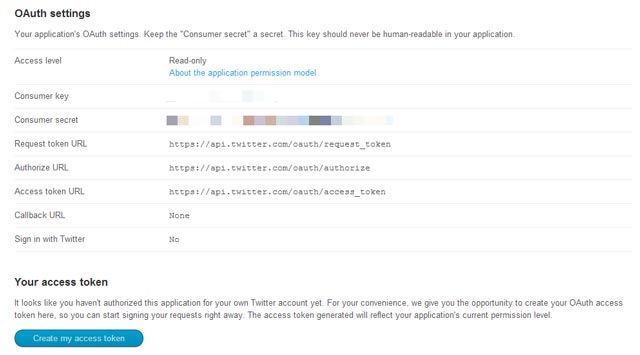
After creating your Twitter Application, you have to give the access to your Twitter Account to use this Application. To do this, click the Create my Access Token.

In order to access the Twitter, that is to say get recent tweets and Twitter followers count, you need the four keys such as Consumer Key, Consumer Secret, Access token and Access Token Secret.
To get all these keys, click the OAuth Tool tab in your Twitter Application and copy those keys and save them in order to use them later. That’s it. Now Your Twitter counter will get the followers count and display them in your widget.
Before using the Twitter feature in your ABCApp, it is necessary to define the Twitter API keys in your editor.
So in the editor, click on the menu “Settings” then on “Twitter”:
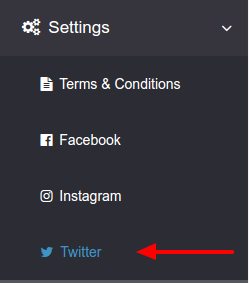
You will have the possibility to enter all the necessary information from your Twitter account:

After adding the Twitter feature to your editor, you have to define the name and the subtitle of the page which will include your Twitter account.
You can also select if you want to use the Social Sharing function that allows you to share info about your app with your customers, contacts and friends, via your social networks or messages applications.
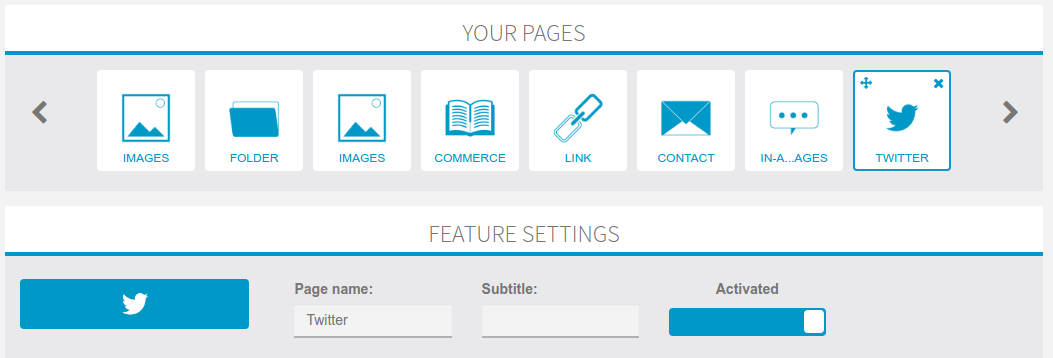
Once you have done the first part to add the Twitter feature into your editor, you need to set up your twitter account. In order to define your account you need to enter your twitter handle. The twitter handle is your personal id on twitter, it starts with the @ symbol.

ou can check the integrity of your Twitter handle by clicking on "Verify".
The following error message will appear if you haven’t entered your Twitter API key :

The following error message will appear if you have entered a wrong Twitter handle :

Otherwise, you will have a confirmation message on your screen like the message below:

Then save your changes by clicking on "OK".
You have now finished to set up your Twitter account in ABCApp!
Author: support
Last update: 2018-11-05 10:25
Thanks to this feature, your customers can schedule an appointment at your business(es).
If you want to add this feature to your application, that is very easy. First of all, you have to click on the Booking feature:

Then, you have to click on "+" and to enter the location of your business and the email address of the manager:

If you have several businesses, you can add these businesses to your Booking feature. To do that, you only have to click on "+". Then, you just have to enter the location of this business and the email address of your manager. You can do this process, as many time as you want in order to reference all your businesses.
Why these information ?
The location of your business(es) is important for your customers, so that they know exactly where they schedule their appointments.
Thanks to the email address of your manager, the application will send him an email to validate the appointment.
And the result:

Just fill out the different cases you need and your appointment is done!
Author: support
Last update: 2018-11-05 10:03
In this article, we will learn how it is possible to integrate your playlists or the one of your favorite artists into your app.
To create a Music page in your app click on 
Now this appears:

Click on "+" to create a new playlist in this page.
This appears :

Enter the name of your playlist and a cover photo.

Then click on “OK” to save your choice.
This appears:

Click on the iTunes icon 
This appears:


Click on the SoundCloud icon 

If you want to share the tracks of your favorite artists:
Click on "Search". This appears:
As for iTunes, you have the choice between Playlist and Track. Select the one you want and then enter your search in the field.
For example this appears:
Click on the album, the track or the artist you want to add to your playlist. Then click on "Add".
Click on the Podcast icon 
Enter the URL address of the podcast ( .xml format) you want to integrate. Then click on "Search".
Then click on "Add" to add this podcast to your playlist.
Click on the custom icon 
In this part you are able to share tracks you host on your own site. To integrate your tracks, enter the information needed in the fields and then click on "Save".


Author: support
Last update: 2018-11-05 10:20
Here is a list of the features that require the user login:
Author: support
Last update: 2017-04-24 11:16
Thanks to this feature you will be able to lock your app wholly or partly. The locked content will be accessible for authorized users only. We are going to see how to set up this feature.
First, you have to add the Padlock feature to your app, click on the padlock from “Add pages” to add this feature to your app.
Then you can set it up.
You have two possibilities to unlock the Padlock and grant access to the whole applications to registered users. The first one is to use a QR Code and the QR Code Scan, and the second one is to create an account for your users, or to let them create their own account. Of course you can use both at the same time if you want, it’s up to you.

To allow your users to unlock the Padlock by scanning a QR Code, select QR Code in the Padlock feature. This will create a QR Code that you have to save and print and, for example, display inside your store to allow your customers to unlock some parts of your app by using the QR Code Scan.

Now let’s see how to set up the pages that will be locked by the Padlock.

“Allow all users by default”:
If you select “yes”, all users who have already an account on your app, or users who create an account on your app, will be allowed to access to the locked content. Setting on “yes” is useful to create a database of registered users who are the most engaged with your content.
If you let on “no”, that means you will have to authorize your users manually from the “Users” menu which is between the “Analytics” and “Extra” menus. We will see how a little bit later in this article.
“Lock the entire application”:
If you choose “yes”, your whole app will be blocked. And users will have to create an account or to create an account and to be authorized depending on what you have chosen for “Allow all users by default”. With this option you can create a private app.
If you choose “no”, you will just block some pages of your app.
Just choose from the list the pages you want to block. Of course, you need to have added pages to your app. You can add pages later and open this feature again to block them. The locked pages will not be displayed to the users until they are authorized to see them. Instead of seeing the tabs of this pages, they will just see one tab meaning there is a private content behind:

Once the user is logged in and authorized, the padlock tab disappears and all the tabs are displayed:
How to authorize the users ?
If you have chosen not to authorize all the registered users by default, you will have to authorize them manually from the “Users” menu, in the editor:

Click on it. All the users who have created an account in your app, are listed.
Click on ![]() to edit a user.
to edit a user.

If you want to authorize the user, all you have to do is to check the corresponding checkbox “This user can access the pages locked by the “locker” feature. Then click on “Ok”.
A little warning regarding the publication of your app on the App Store. Before submitting an app, create a test user with authorized access. Then, when you publish your app on iTunes Connect just fill out these info in the user demo fields to let Apple reviews what is behind the padlock feature.
Have fun!
Author: support
Last update: 2018-11-05 10:07
Here is the feature for creating menus or bundles for a business. You’ll be able to create as many menus as you want.
Necessary components:
Here is what it looks like:
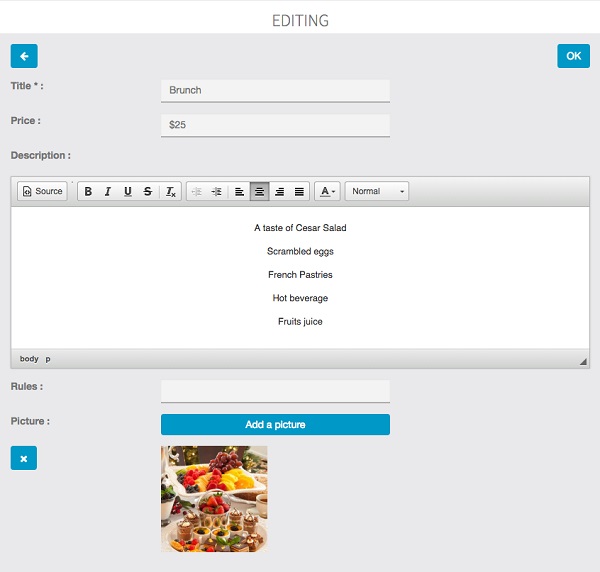
How to create a beautiful menu with the text editor:
Apply a style to your titles (“appetizers“, “dishes“, “desserts” for example) and center all your text. In order to do that, select your title in the text editor and click on ![]() in the text editor’s menu, then click on
in the text editor’s menu, then click on ![]() and choose “title 1” or “title 2”. Your title will be formatted with the Lobster police (the same police that is used for the discount title in the Discount feature).
and choose “title 1” or “title 2”. Your title will be formatted with the Lobster police (the same police that is used for the discount title in the Discount feature).
Press Enter. Enter your appetizers if the title is “appetizer”, press Enter between each item.
To enter a new title (“dishes” for example if you’ve just entered the appetizers), make a separation by pressing Enter and clicking on ![]() in the text editor menu. Then press Enter and reproduce the previous process.
in the text editor menu. Then press Enter and reproduce the previous process.
These modifications won’t be visible in the text editor nor in the app preview but will be well considered in the application.
Then, if you can, enter a picture for this menu and save all.
To enter a new menu, click on "+" and repeat the above process.
You can obtain this:
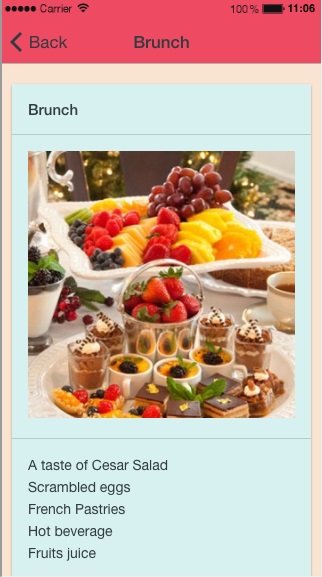
Your customers are now ready to order in your restaurant!
Author: support
Last update: 2018-11-05 10:13
The form feature allows you to do plenty of things like giving your clients the opportunity to ask you questions, to order products, send a photo or to join an event… To sum up, this feature will adapt to your expectation about form.
So let’s see how to create a form page.
To create a form click on  in the “Add pages” part. This appears:

To create a first section click on “+Add section”. Give a name to this section. Here we will start by “Example” to show you what is possible to do with this feature. Then this window appears:

To add a field click on “+Add a field”. This window appears:

Let us introduce the different fields:
![]() : This field enables the user to write a short text (ex: his name…)
: This field enables the user to write a short text (ex: his name…)

![]() : This field enables the user to write his email address to contact him.
: This field enables the user to write his email address to contact him.

![]() : This field enables the user to write a number (ex: the number of people for a reservation)
: This field enables the user to write a number (ex: the number of people for a reservation)

![]() : This field enables the user to write the date and hour (ex: the hour he wants to pick up what he orders)
: This field enables the user to write the date and hour (ex: the hour he wants to pick up what he orders)

![]() : This field enables the user to indicate his GPS position when he sends the form.
: This field enables the user to indicate his GPS position when he sends the form.

![]() : This field enables the user to write a long text on several lines (ex: a client can write his answer here)
: This field enables the user to write a long text on several lines (ex: a client can write his answer here)

![]() : This field enables the user to select several options
: This field enables the user to select several options

![]() : This field enables the user to only select one option between the ones submitted.
: This field enables the user to only select one option between the ones submitted.

![]() : This field enables the user to select the option they want.
: This field enables the user to select the option they want.

Every times you enter a new field, you have the possibility to make this field compulsory. It means that the user cannot send the form if this field is empty. To do this click here:

You can create as many fields as you want in a section. But we recommend you to organize your form clearly to be easier for the user to fill it out.
Once you have entered all the fields you want to set up, you only have to indicate the email address of the manager in the appropriate box.


You’re now ready to get reviews from your customers!
Author: support
Last update: 2018-11-05 10:42
This feature allows you to integrate feeds from blogs or news websites either from the business for which you’re creating the application or other sources in relation with the business or both. You can create as many feeds as you want.
Here is how it works:
It doesn’t matter if you know or not the feed link you want to integrate.
Just enter a title for your feed and then the url of the website from which you want to extract the feed. Click ok. If there are some feeds for this website, ABCApp will display them and let you choose the one you want.

In a second case, you can just enter the name of the site you want to extract the RSS feed. ABCApp will automatically scan this website to find the RSS feeds on this one.

Then just choose the feed you want to display and save. You obtain this:

You can choose a different design for your page, from the design section at the bottom of the feature:

Author: support
Last update: 2018-11-05 10:39
This feature will allow you to create discount coupons that will be unlocked by scanning a specific QR Code. Once unlocked, the customer can use the discount when he wants.
That means the coupon will not appear in the app for the user until he has scanned the QR Code (When you will add a coupon code you will not see it until you’ve scanned the QR code). As a business owner you create a QR coupon, and you obtain a QR Code. You can distribute this QR code on your website or in a newsletter, etc to reward specific actions, or just show it to premium clients so that they can flash it. Once scanned the coupon will appear in their apps.
To add it to your app, just click on  from “Add pages”.
Then let’s create a QR Coupon.

– You can add a picture to illustrate your special offer.
– Give a name to your coupon.
– Enter a description of your special discount.
– Enter the required conditions to access this discount.
– You can decide if you want this discount to be available only once for each customer or unlimited.
– Then you can decide if you want your discount to be limited in time and set an end date. But you can also decide to set it to “illimited” and decide later when you want to stop this special offer.
Once you’ve set your coupon as you want, click on “Generate QR Code”. It will create a QR Code that you can print and display anywhere you want to allow the users of the app to scan it to benefit from your QR Coupon!. Note that you don’t have to add the Code Scan feature to your app because your QR coupon will be scanned from the scanner which is in the feature QR Coupon directly (do not scan from the Code Scan feature as it will not work from this feature).
Author: support
Last update: 2018-11-05 10:14
Once your application is featured on the App Store and Google Play, you’ll be able to send push notifications.
First of all, to be able to send notifications , your app must be set as “published”.
Then , from the app editor , It is quite simple. You have to click on the Push feature. This will appear:

hen, you have to click on the "+", to create a new Push message. This will appear:

The option “Open a feature or a custom url” allows you to redirect your users to a specific url or a specific page of your app when they open the push notification.
Now, choose your message an click on ![]() . Once you have clicked, this will appear:
. Once you have clicked, this will appear:

This option allows you to choose if you want to send your notification to all your users or only to those who have subscribed to specific topics
Click on “Send to all my users” and then click on ![]() . This will appear:
. This will appear:

It enables you to choose if you want to send your notification now or on a specific date. If you choose “now”, you only have to click on OK to send your notification.
But if you want to send your notification on a specific date, this calendar appears:

Choose in the calendar the day and hour you want your notification to be sent. Then click on “Done” to validate your choice.
Finally click on OK to validate your notification. Your notification will be sent at the moment you choose.
To know how to create topics and send topic based notifications.
From the first step of creating push notification, after having wrote your message, just choose “send to a specific location”.

Then enter an address and choose a radius.
On the next step you will be able to choose to send to all your users, or to send to users who have subscribed to some specific topics. That means you can combine geolocation and topics.

Then choose if you want to send your notification now or at a specific date, and also choose if :

You can now send Push Notifications directly from the Editor.
First, click on the Push Notification icon ![]() on the top screen of the Editor.
on the top screen of the Editor.
Then this page appears :

You’re done!
Author: support
Last update: 2018-11-05 10:43
With the discount feature you’ll be able to create as many discounts as you want and display them in the application.
Here are the various parts of a discount:
Here is what it looks like:

o enter a new discount, click on "OK" and repeat the process.
After having created some coupons, you can also change the design of the page from the different page designs which are available from the “Design” section at the bottom of the feature:

Author: support
Last update: 2018-11-05 10:12
With the Social Gaming feature, business owners will be able to increase the purchasing frequency of their clients by giving them their ranking based on their loyalty. This feature is working only if a loyalty card is integrated in the application. The more a user gets loyalty points, the higher his level in the ranking will be.
All users see their positions in the ranking and the business owner can offer a gift to the leader. The more the gift is important the more the challenger users will come back to dethrone the leader, and the more the leader will come back to consolidate his rank.
The period of a game could be a month or a week. After this period the game will restart with counters reset to zero. For a first game, we advise to choose a monthly period as the user base isn’t important. When more and more users have downloaded the application on their mobile, the period can be set to a week.
Give a name to a new social gaming. It’s just for you and won’t appear on the mobile application.
Author: support
Last update: 2018-11-05 10:17
With the Loyalty feature you’ll be able to create a loyalty’s punch or stamp card. It means there will be a reward after a number of purchases. For example “one burger for ten bought”.
To validate a loyalty point the business owner will have to enter a four-digit password. As with loyalty stamp card, the client has to show his card to the retailer for stamping it, with our digital loyalty card, the client has to show his smartphone and the retailer has to enter his four-digit password to validate a point.
Here are the things required to create a loyalty card:
Here is an example:

It is possible to create a password for each employee. Like this it will be more easy to verify who validates what.
To create a password, you just have to click on the “my passwords” button:

3. The loyalty card in the application:

To validate a point, the client “touches” a point and shows his smartphone to the retailer:

The retailer chooses the number of points and enters his password :

Note:
It is not possible to edit or delete a loyalty card. Why? Because it works like a real punch card, when a user gets a punch card with a particular offer and begins to validate some points on it, it can’t be changed (meaning that it would be too easy to attract customers with a big offer and then to change it for a lower one while they already have some points validated on it).
But it’s possible to create a new card with a new offer. All the customers who have already validated points on the old card, will keep using this card until it is completely validated, and then they will get the new card. The customers who haven’t validated points yet on the old card, will get the new one instead.
have fun
Author: support
Last update: 2018-11-05 10:15
This article will explain how to use the Editor’s Messages feature.
Sometimes, multiple users want to work on the same app. ABCApp gives you the ability to share an app between multiple users in order they work together on the same project.
But how can they talk to each other about modifications they make, share ideas about the great app they are building?
The Editor’s Messages feature comes to answer to these needs.
From this feature, directly inside your app Editor, you are now able to share your ideas and tell to the others what you are doing. You can also share images/photos:
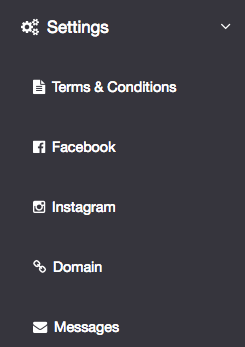
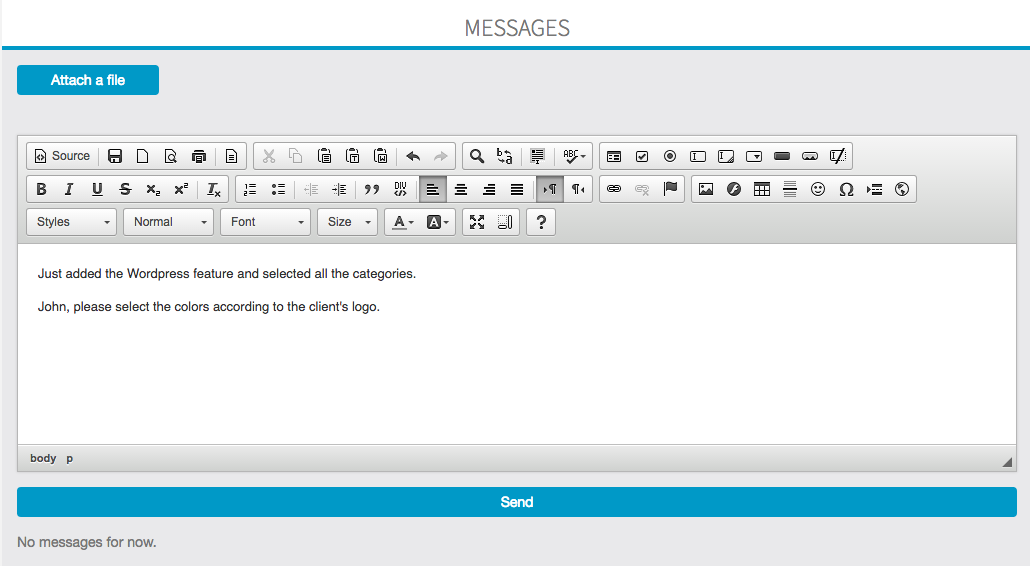

Is Done! It is as simple as that
Author: support
Last update: 2017-04-25 06:53
This feature enables you to offer a weather widget in your app to display the forecasts for a particular city or to the users find the ones for their locations.
You just have to choose a country and a city, then save.


Author: support
Last update: 2018-11-05 10:37
This feature allows you to create Topics your users can subscribe to, in order for you to send Push Notifications and In App Messages only to those who have subscribed to a specific topic.
Author: Dominik
Last update: 2018-11-05 10:45
This feature allows you to create a contact page for your business. Just complete the fields to automatically create a one-touch-call button, a geolocation button and a contact form.

You can obtain this:


Done!
Author: support
Last update: 2018-11-05 10:40
The Calendar feature will enable you to share with your users the place and date of your events and the ones you will be present to.
To create a Calendar feature, click on “Calendar” ![]() in the add pages part. This page appears:
in the add pages part. This page appears:


– Copy this address and paste it in the “Calendar’s URL “ field:

Finally click on OK to validate your event.


Thus, you have to enter all the required information for your event and an illustration picture.
In the expected answer you can enter the URL of your booking center if your users have to book a reservation.
Done!
Author: support
Last update: 2018-11-05 10:02
To login to AdMob you need a Google Adwords account. Create one first at http://adwords.google.com
– click on “Monetize a new app”
– Select an app:
In this second case, enter the name of your app.
Select the platform depending if you want to integrate your ad on an iOS, Android or Windows device. (On ABCApp for now it just concerns iOS and Android). Then click on “Add app”.
Then choose from interstitial or banner. An interstitial ad is an ad which will open when the app starts on the homepage only, covering all the screen size.
For the kind of ad that will be displayed we advise you to choose if it will be text ads only, illustrated ads, or video ads, or you can choose both. You can also set the delay between each ads.
Name your ad block a way you will remember like “interstitial ad for iOS”.
Click on Save and you obtain the ad block ID which looks like that: ca-app-pub-XXXXXXXXXXXXXXX/XXXXXXX
You can repeat the same process to create another kind of ad, or the same kind of ad but for another kind of system/device.
Just go to your editor.
Go to the Publication section
Check “Monetize my app using AdMob?” and enter the ad block IDs for each OS. Note that you can enter an ad for one OS only and this way it will display an ad just for the devices using this OS. For example if you enter an ad block ID for iOS and not for Android, only the iOS devices will see the ad, the Android ones will have no ad. (Note that the ad is not displayed immediately, there is always a few minutes delay after you have integrate the ad block ID before the ad is displayed in your app).
Now you can integrate ads in your Apps with AdMob!
Author: support
Last update: 2017-05-09 22:33
This features allows you to create Product pages.
Little warning: if you have menus, don’t create them with this feature but use the “Menu” feature instead which is more appropriate.

![]()

Notes :
An example of a subcategory order modification:
The subcategory “With Bacon” is 1st:

The subcategory “With Bacon” is 2nd:
You can do the same thing with products:
“Alabama” is 1st:

“Alabama” is 2nd:

You can obtain this:

You can also choose another design for your page, from the different page designs at the bottom of the feature:

Author: support
Last update: 2018-11-05 10:16
This feature will allow your customers to use their camera to flash a QR Code and to access specific content.
To add this feature to your app, just click on ![]() in “Add Pages”.
in “Add Pages”.
Basically, a QR code is data encrypted as an image. When you use your QR Code Scan, it will get you to the content it is linked to. It can be a specific url outside the app, an image, text or anything.
For those who don’t know what is a QR Code, it looks like this:

Note that each and every QR Code is related to a specific content.
(Warning: When you add the QR Code Scan feature, the icon will not be displayed in the Editor Previewer on the right. It is normal, and it will be displayed once the app is published)
The QR Code Scan will allow your users to:
– unlock discount QR coupons: QR Coupons
– unlock the Padlock: Padlock
Author: support
Last update: 2017-05-08 18:22
Author: support
Last update: 2017-05-11 16:13
WordPress feature allows you to integrate the content of a WordPress blog or website in an application.
ex:

2. Or you can create an application with several wordpress pages in order to publish in each of these pages the content of one category of the blog. This way the application homepage will look like this:

Of course, you can change the icons of the wordpress pages in order to set up your own design. To sum up you can add as many wordpress pages as you want to enlighten the content of the blog.
Now, we are going to learn how to integrate the content of a WordPress website in an application.
First of all you must add a WordPress page in your application. Click on ![]() . This window appears:
. This window appears:

Click on “Click here to download our WordPress plugin”. Without this plugin you cannot use this feature.
Then, go in your wordpress admin interface. This window appears:
Click on “Plugins” then “Add new”. This windows opens:

Click on “Upload”. This appears:


Here for example, we decided to only select the “Exercices” category, but we could select others if we wanted to. You can adopt the strategy you want, either you can create an application with only one wordpress page in which you will publish all the content of the blog, or you can create an application with several wordpress pages in order to publish in each the content of one category of your blog.
Once you have chosen your strategy and imported your wordpress content, don’t forget to click on “Save”.
You’re done!
Author: support
Last update: 2017-04-26 10:41
This feature allows you to create image galleries. You’ve got four options:

The “name” field allows you to give a name to your gallery. If you have several galleries, users will thus be able to choose the gallery they want to take a look at.
With the “search” field you’ll be able to retrieve all photos from Picasa that are relevant to this search.

And the result is:

You can also retrieve all photos from a specific Picasa album or Picasa account:
Since Instagram has changed their API policies, now you must use your own Instagram keys in order to create an Instagram gallery. You will find how to create your Instagram API keys here.

And the result is:

Name your gallery, and click on “0 image” to upload photos from your computer.

You can upload several photos in the same time, just select from one folder all the photos you want to upload.
It’s not mandatory, but you can enter a title and a description for all your photos.
Click on “Ok” to save your gallery.
Enter the Facebook ID of your Facebook page and choose which images you want to show in the “Search” field .
To create a new gallery, click on ![]() and repeat the above process.
and repeat the above process.
You can also create a gallery from a Facebook Fan Page, just enter the Facebook Fan Page ID and do the same process.

You’re done!
Author: support
Last update: 2017-04-26 14:30
The Social Sharing function allows you to share info about your app with your customers, contacts and friends, via your social networks or messages applications.
To enable the function for a feature, you just need to switch the Social Sharing button to “Yes” in this feature.
For example, here in NewsWall feature:

Note: You will not see a difference or any icon in the Editor’s previewer. The Social Sharing function icon appears in your app.
Now, open your app on your device. As you can see, the Social Sharing function icon appeared in the top right corner of the screen:
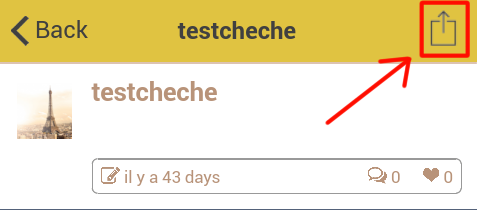
Now, you are able to share the articles, posts and other informations about your app with the people you like.
Note: In order to share contents on Facebook, do not forget to fill in the API keys in your backoffice then re-generate your app.
Author: support
Last update: 2017-04-25 09:36
With the Fan Wall feature, users of your application will be able to post comments and/or photos and to discuss among themselves.
When you add the Fan Wall feature to your application, you can set the “Near me” settings. It will allow a user to display on the Fan Wall only comments/photos from users around him, in the radius you have determined.

You can add messages directly from the Editor by clicking on “Add an item” and then type your text and/or upload an image.

Or you and the users of the app can add messages on the Fan Wall through the application. Just click on the little icon in the upper right corner of the Fan Wall page.
![]()
Then create an account or log in (if you already have an account). And then type your message and/or upload a picture.

Let’s see how it looks on the Fan Wall. You can choose “Near me” to display messages posted from a close position to you (determined by the “Near Me” radius), or “Recent” to display recent messages.

You can also click on “Photos” to display a gallery with all pictures that were uploaded to the Fan Wall.

And you can finally click on “Map” to display a map and to display the pictures geographical position.

Of course, the Fan Wall page allows your users to like and comment content that was posted, so that they can interact.

Done!
Author: support
Last update: 2018-11-05 10:24
This feature allows you to create a news page with a photo and comments from users. It works like a news wall, users are able to find all the posts you wrote on it.
To create a news, first of all you have to upload your logo: click on modify my logo and upload one.
Then click on ![]() and create your news. Keep it simple and short, users will read it on their mobile device so it must be short. Insert a picture if you can.
and create your news. Keep it simple and short, users will read it on their mobile device so it must be short. Insert a picture if you can.
You can obtain this:
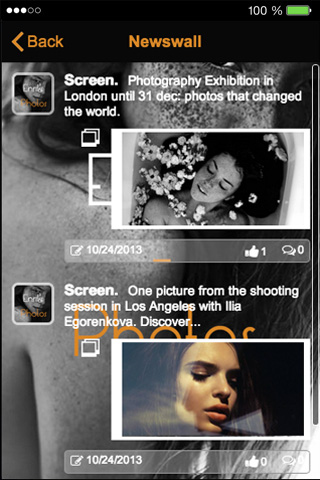
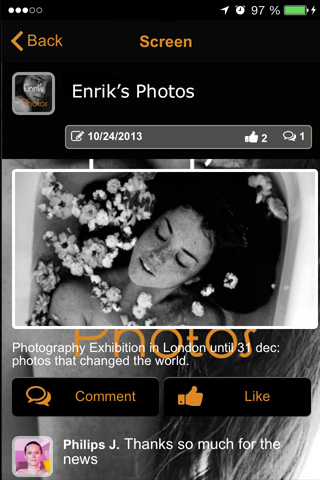
You can choose another design for this page by choosing from the different page designs in the design section of this feature:

Author: support
Last update: 2018-11-05 10:26
With the “Radio” feature you can add a radio streaming inside your app.
It’s very simple to set up but you need to have the good streaming URL.
Here is how a good streaming URL looks like for our “Radio” feature:
Example of good URLs for streaming:
Your URL mustn’t end by “listen.pls” or “listen.m3u”, etc. Meaning that if your URL is http://62.210.36.44:9110/listen.pls, you need to just keep http://62.210.36.44:9110.
Note that sometimes you will need to add “/;” at the end of your URL to make it work both on Android and iOS, for example you will add to add the url like this http://62.210.36.44:9110/;
Note: Since Apple is requiring apps to use IPV6 networks, streams URL needs a domain name and not an ipV6 to work properly on iOS : http://www.hosting-serv.com:9110 rather than http://62.210.36.44:9110/
Then fill in the fields with the appropriate info, like in this example:

Then you just have to click on “save”, and you’ve just set up a radio streaming in your app.
Note: Streams using audio/aacp with a 32kbps bitrate are not working. You have to use a greater bitrate.
Note: The AACP/AAC+ audio format is not supported by Mozilla Firefox web browser. If the Radio feature does not work, check that you are not trying to open a AAC+ stream with Firefox. It works perfectly with Chromium/Chrome.
Author: support
Last update: 2018-11-05 10:22
The In App Messages feature allows you to display a message to users that are currently using your application.
First, create a new in app message by clicking on ![]()
Now is the time for you to give a title to your message and to write the text you want the users to see. You can also add an image that will be displayed on the screen of your users.

Then click on ![]() to continue the process and to select if you want your message to be sent to a specific location.
to continue the process and to select if you want your message to be sent to a specific location.

You can set an expiration date for your message.

You can either set your message to be sent right now, or you can program it to be sent at a specific date and time.

Once you’ve decided whether to send your message now or later, click on ![]()
Author: support
Last update: 2018-11-05 10:44
With ABCApp you’ll be able to integrate videos from Youtube galleries, Podcast and Vimeo. If you want to integrate a business video gallery, the best is, if not already done, to create a Youtube or Vimeo channel in which you’ll upload all the business’s videos.
You can also create a thematic gallery from other sources than the store itself (for example a fashion video gallery for a trendy bar).
Note: Keep in mind the Videos feature is used to display galleries only. If you want to add a single specific video, please use the Custom Page .
Here is how it works, it’s quite simple:
Start by naming your gallery, so that if you create several galleries, users will be able to select the one they want to watch.
Then, in the “search” field, what you’re are going to enter depends on what type of search you’re are going to select:
You already have created the store channel on Youtube and uploaded the videos to this channel. Here is how you create the gallery:
Enter the name you want for your video gallery and then the name of your Youtube Channel in the “search” field. Then choose “Channel” for “Type”:

or the ID of the Youtube channel in the “search” field. Then choose “Channel” for “Type”:

Enter the name you want for your video gallery, the keyword you want to search for in the “search” field, and choose “Search” in “Type”.
Here is the result:

If you want to add another gallery, just click on ![]() and repeat the above process.
and repeat the above process.
You can also integrate videos from podcasts. To do this, you have to enter the name of your video gallery and the URL address of your podcast.

If you want to add a channel you have to enter the ID of the channel in the “search” field and select “Channel” in the “type” select box.
You can find the ID of the channel at the end of the channel URL. For example, for this channel:
https://vimeo.com/channels/123456 you just have to enter “123456”.
For the other types of choices (User, Group, Album), it is the same process than for Channel. Just enter the ID that appears at the end of the URL. For example, to import all the videos of this user:
https://vimeo.com/user12345678
enter “user12345678” in the “search” field and select “user” for type.

Author: support
Last update: 2018-11-05 10:21
The Links page allows you to share information linked to your business with your clients.
For example, you can create pages like this one with this feature:
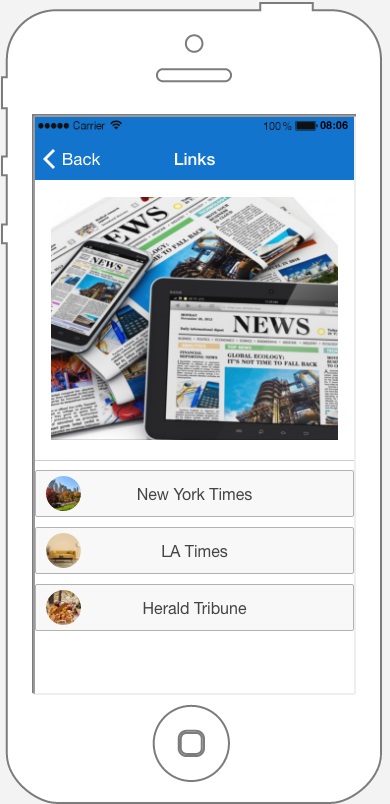
If you want to create a Links page, click on ![]() . It opens this window:
. It opens this window:

First of all, you have to work on the content, then you can work on the design.
To add a new link, clik on “+ Add a link”. Then this appears:

Now, you just have to write the name of your link in “Title” and the url address of the link in “link”. You can also add a logo to your link if you click on ![]() “Picto”.
“Picto”.


If you click on the background (here the blue rectangle) you can change it.
Author: support
Last update: 2018-11-05 10:49
We are going to see how to use the Facebook feature to integrate your Facebook fan page into your app with the design of your app.
note : you have to fill the Facebook API in backoffice > settings >APIs
First you have to add a Facebook page in your app by clicking ![]() from “Add pages” to add it in the carrousel of your pages.
from “Add pages” to add it in the carrousel of your pages.
Then just enter the ID of your Facebook Fan Page in the appropriate field, for example for our Facebook Page: https://www.facebook.com/facebookpages, it will be “facebookpages”:

Then press “ok” to import your Facebook Fan Page.
Here is the result:

Author: support
Last update: 2018-11-05 15:57
With this feature you will be able to create public chatrooms and let your users create their own private chatrooms and chat with each others.
1. First, click on ![]() in the “Add pages” part. This will appear:
in the “Add pages” part. This will appear:

2. To create a chatroom, click on Add a chatroom, enter its name and description and click on OK.

3. The feature in the application.


Tap ![]() to display the settings of the chatroom.
to display the settings of the chatroom.

On this page you can change your nickname and select the type of notifications you want.
To create private chatroom or manage your friends, tap ![]() on the main page of the feature.
on the main page of the feature.


There you go!
Author: Dominik
Last update: 2018-11-05 10:23
With this feature, you will be able to create a list of job offers.
Click on 
in the “Add pages” section, to add the feature to your app:
(Please note that the tab “Positions” is available after you have created one company at least)

Author: Dominik
Last update: 2018-11-05 16:05
Features overview Maps
Author: Dominik
Last update: 2018-11-05 16:12
Generate different screenshots based of high resolution image provided
https://www.appstorescreenshot.com
https://app.shotbot.io/#/sign-up
https://developer.android.com/distribute/marketing-tools/device-art-generator.html
https://realfavicongenerator.net/
for example:


Author: support
Last update: 2017-04-27 09:21

To distribute an application on the App Store, you need to subscribe an Apple Developer account. The Apple Developer Program annual fee is 99 USD.
If you don’t already have an Apple Developer account you can subscribe your account here: https://developer.apple.com/programs/enroll/
Once you’ve completed your enrollment in the Apple Developer Program, you can sign in to iTunes Connect with the Apple ID you used to enroll. iTunes Connect is where you manage your App Store apps, see your sales reports, manage your iTunes Connect users and testers, and more.
For more information about the complete process use the link below: https://itunespartner.apple.com/en/apps/overview

To distribute an application on the Google Play Store, you need to subscribe a Google Play Developer account. There is a $25 USD one-time registration fee. https://play.google.com/apps/publish/
If you don’t already have one you can subscribe your account here: https://developer.android.com/distribute/googleplay/start.html

Amazon Appstore is free!
The Amazon Appstore allows developers to distribute and sell their Android and HTML5 web apps to millions of customers in 236 countries and territories around the world through the Amazon device ecosystem. The Amazon Mobile App SDK gives developers access to a range of APIs and services to earn more revenue, engage audiences, and manage apps. https://developer.amazon.com/

Opera Mobile Store is free!
Opera Mobile Store provides over 300,000 apps and games for more than 7,500 different mobile phone models across Android, Java, Symbian, BlackBerry, Windows Mobile, Windows Phone and iOS platforms.
https://publishers.apps.opera.com/
Author: Dominik
Last update: 2017-05-08 15:39

There are two options to distribute an application on the App Store:
The manual method
You have a minimal technical knowledge and you want to publish yourself your application manually. In this case, take the following steps:
1. First you need to generate in ABCApp the sources code of your application.
Connect to your backoffice, select the concerned application in Manage > Applications by clicking the button on the right of the list. In the section called “Mobile Source Codes & Builds” click on “Generate sources”. Your request enters the queue and is going to be generated,then a link appears to download the generated sources code.
2. Then you have to use an Apple software called Xcode to compile yourself the concerned sources code in the aim of generating your application. Of course, you need to have a Mac to be able to use Xcode.
![]() You can download this software here: https://developer.apple.com/xcode/
You can download this software here: https://developer.apple.com/xcode/
To find more information about how to use Xcode in aim of generating your application, please read this article: ...
Actually you can do that without a Mac computer but you have to emulate your computer to install Mac OS and then install Xcode on Mac OS. Here is an article about that: https://www.udemy.com/blog/xcode-on-windows/
3. Connect to your iTunes Connect account to complete your app page with your screenshots, description. Then click on “Submit for review”. You can find more information in the documentation below: ...
Author: Dominik
Last update: 2017-05-08 17:48

The automatic method
Publication - > General information -> Generate Android APK -> [Generate APK]
Click on the button “Generate APK” and few minutes after your APK is available for download. [Download latest]
Author: Dominik
Last update: 2018-11-05 11:02
here's the explanation
https://support.abcapp.org/index.php?action=artikel&cat=2&id=41&artlang=en
Author: Dominik
Last update: 2018-05-03 11:14
In this article we are going to see how to publish an app on iTunes.
To know before publishing
1. Xcode and MacOS
To publish an iOS app you need a Mac computer because you must use Xcode software. Actually you can do that without a Mac computer but you have to emulate your computer to install Mac OS and then install Xcode on Mac OS. Here is an article about that:
https://www.udemy.com/blog/xcode-on-windows/
2. The certificates
An iOS publication under one developer account needs 4 files, one file that will sign the certificates and 3 certificates. The file that will sign the certificates and one of the 3 certificates are used for all apps published under one developer account, and the two other certificates must be created each time you will publish a new app.
The ones that are used for all apps published under one developer account:
These 2 files will be created once (the first time you are going to publish under this developer account). It is the CertSigningRequest (CSR) and the iOS distribution certificate (iOS_Distribution). The CSR is created from your computer (must be a Mac) from the Keychain Access, and the iOS_Distribution is created from the Member Center at developer.apple.com.
These two items must be stored in the main certificates folder for this developer account on your computer (it will be better in term of organization if you are willing to publish other apps under this account). Thus if we consider this example, for the client named “John Doe” who has his own developer account, on your computer there will be these folders with this organization:
You will use this CSR and iOS_Distribution certificate for all the apps that you will publish for John Doe, if there are several apps to publish under this account. You create once and you use them each time you publish an app for John Doe under his account. For your information, the Keychain Access to create the CSR is in your Mac in Applications > Utilities.
The two other certificates are the Apple Push Services certificate and the Mobile Provisionning Profile. You will have to create them for each app, as you can see in the video. You will stored them in the certificates folder which is in the app folder. Thus if we consider the previous example, for the client named “John Doe” who has his own developer account:
3. To create the screenshots
You will need some screenshots to fill out the app sheet on iTunes. You will be able to make them with Xcode and especially with the iOS Simulator delivered with Xcode. Open the Xcode project that is in the ios_source folder (see in the video when opening the project with Xcode), then choose the target, iPhone 8 Plus for instance, and click on the Play button (For your info, the ios_sources of an app can be downloaded from its page from your backoffice > Manage > Applications):

Take some screenshots of the app for this target using CMD+S from your keyboard, and do it for each target you want screenshots. Before switching from a target to another don’t forget to click on the “stop” button in Xcode.
You have to create a CSR file and an iOS Distribution certificate. And you will be able to use these items for all of the next apps you will have to publish under this developer account –> keep them preciously once created.
5. The CSR File
It must be created from the keychain access tool of your Mac. Open it from Applications > Utilities > Keychain Access:

From the menu select “Keychain access” > “Certificate Assistant” > “Request a Certificate From a Certificate Authority”:

In the window that opens, enter the email of the developer account (or any other email address, it doesn’t have any impact), and enter the name of your developer account, and select “Saved to disk”:

Save this CSR to your disk, in a folder related to the certificates of your developer account.
Close the window.
6. The iOS Distribution certificate
– Connect at https://developer.apple.com/membercenter/index.action with the developer account
– Click on “Certificates, Identifiers & Profiles”

– Click on “Production” which in the main “Certificates” menu in the menu on the left:

– Then click on [+] from the upper right
– Choose “App Store and Ad Hoc” and click on “continue”:

– Click on “Continue” again
– Sign your iOS Distribution certificate with the CSR file you have created before.
– Download the iOS Distribution certificate that has been created.
– Double click on the iOS Distribution certificate (ios_distribution.cer) to add it to the Keychain Access.
7.1 The Apple Push Services certificate
Thanks to this certificate you will be able to add push notifications, in-app purchase, and other services to your app. In our case, only the push notification service is interesting.
– Click on “App IDs” from the “Identifiers” menu on the left:

– Click on [+] from the upper right
– Enter your app name, and the bundle id of the app:

– Go below and select “Push Notifications” in the list of “App Services”:

– Click on “Continue”
– Click on “Register” and click on “Done”
– Then in the list, find the app id you have just created and click on “Edit”

– Go at the bottom and in Push Notifications, in the “Production SSL Certificate” section click on “Create Certificate”

– Click on “Continue”
– Click on “Choose File” and upload the CSR file you have created before for this developer account (the same CSR you have used to create the iOS Distribution certificate for this developer account)

– Download the Apple Push Services certificate (aps.cer) that has just been created. Store this certificate in a folder related to this app on your Mac.

– Click on “Done”
-Double click on the Apple Push Services certificate (aps.cer) to add it to the Keychain Access.
7.2 The Provisionning Profile
– click on “Distribution” from “Provisionning Profiles” on the left menu:

– Click on [+] from the upper right
– Choose “App Store” under “Distribution”:

– Select the app ID of your app, and click on “Continue”

– Select the iOS Distribution certificate associated to the CSR you have used to sign the Apple Push Services Certificate you have created just before (it is very important to use the iOS Distribution which has been created with the CSR used to sign the aps.cer of this app. Don’t forget it, and don’t forget that in case you create a new aps.cer for this app with another CSR you will have to create a new provisionning profile too with the iOS Distribution certificate made with this CSR, and then to publish an update of your app on the App Store)

– Click on “Continue”
– Name the provisionning profile and click on “Continue”

– Download the provisionning profile that has just been created. Store this certificate in the folder related to this app on your Mac, and which contains the Apple Push Services certificate created just before.

– Download your iOS source code
– Unzip the folder and open the .xcworkspace file in Xcode
Author: Dominik
Last update: 2019-02-12 10:37
With the Twitter feature you will be able to include your Twitter account in your application.
To get Twitter Access keys, you need to create a Twitter Application which is mandatory to access Twitter.

After creating your Twitter Application, you have to give the access to your Twitter Account to use this Application. To do this, click the Create my Access Token.

In order to access the Twitter, that is to say get recent tweets and Twitter followers count, you need the four keys such as Consumer Key, Consumer Secret, Access token and Access Token Secret.
To get all these keys, click the OAuth Tool tab in your Twitter Application and copy those keys and save them in order to use them later. That’s it. Now Your Twitter counter will get the followers count and display them in your widget.
Before using the Twitter feature in your ABCApp, it is necessary to define the Twitter API keys in your editor.
So in the editor, click on the menu “Settings” then on “Twitter”:

You will have the possibility to enter all the necessary information from your Twitter account:

After adding the Twitter feature to your editor, you have to define the name and the subtitle of the page which will include your Twitter account.
You can also select if you want to use the Social Sharing function that allows you to share info about your app with your customers, contacts and friends, via your social networks or messages applications.

Once you have done the first part to add the Twitter feature into your editor, you need to set up your twitter account. In order to define your account you need to enter your twitter handle. The twitter handle is your personal id on twitter, it starts with the @ symbol.

ou can check the integrity of your Twitter handle by clicking on "Verify".
The following error message will appear if you haven’t entered your Twitter API key :

The following error message will appear if you have entered a wrong Twitter handle :

Otherwise, you will have a confirmation message on your screen like the message below:

Then save your changes by clicking on "OK".
You have now finished to set up your Twitter account in ABCApp!
Author: support
Last update: 2018-11-05 10:25
Author: support
Last update: 2017-05-11 16:13
Go to https://developers.google.com/maps/documentation/javascript
Then click on ![]() on the upper right.
on the upper right.
Then select “Create a new project”
Then you obtain your API key:
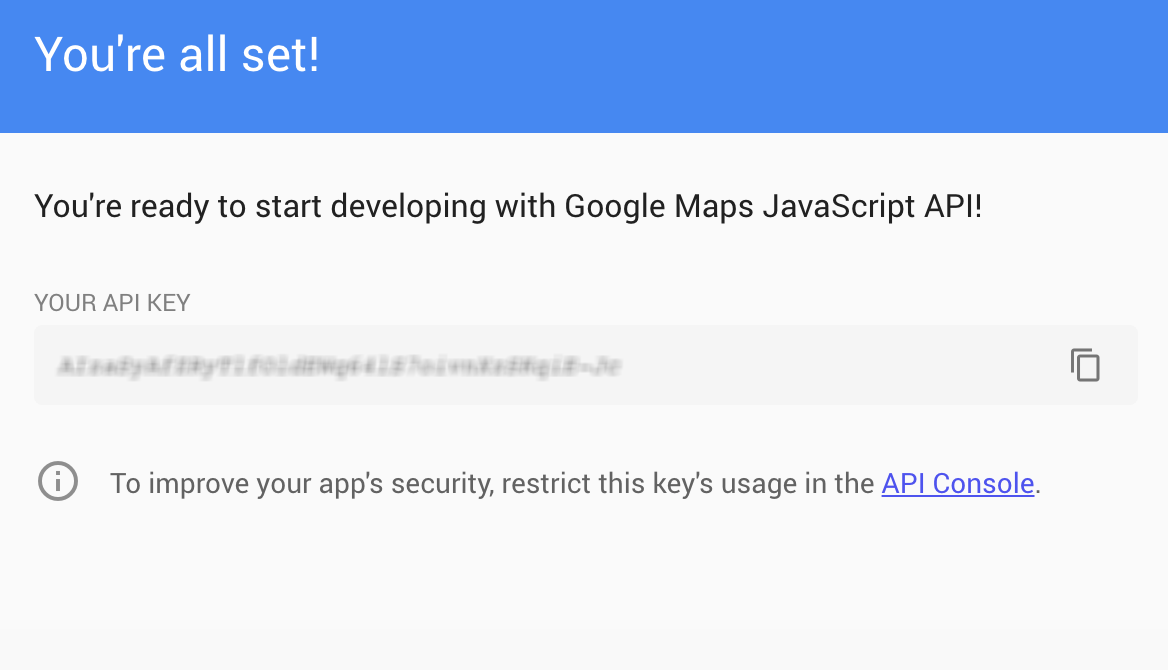
Click on the link “API Console”:

In the new window, for the Key restriction, select “None”.
Save and you’re all set!
Now you just have to copy and paste your API key in your editor in Settings -> Advanced.
Finished
Author: Dominik
Last update: 2017-05-11 16:12
1. You need an Instagram account
2. Login at http://instagram.com/developer/
3. Click on Manage Clients (in the header menu at http://instagram.com/developer/)
4. Click on Register a New Client
5. Fill out the fields, for the App Name enter the name of your company or your apps builder, and for the app description just tell that this Instagram app allows the users to integrate Instagram photo galleries in their mobile applications. In the Website and OAuth redirect_uri field,just enter the url of your ABCApp, like http://apps.abcapp.org.
6. Now you have a Client ID and a Redirect URI
7. Click on “Manage” to enter in your Instagram app, then click on the “Security” tab, uncheck “Disable implicit OAuth:” and click on “Update Client”.
8. In this URL: https://api.instagram.com/oauth/authorize/?client_id=CLIENT-ID&redirect_uri=REDIRECT-URI&response_type=token replace “CLIENT-ID” and “REDIRECT-URI” with your own info, and then paste the url in your browser. For instance the URL to paste in your browser would be like https://api.instagram.com/oauth/authorize/?client_id=817718189191&redirect_uri=http://www.mydomain.com&response_type=token if your CLIENT-ID is “817718189191” and if your REDIRECT-URI is http://www.mydomain.com
9. Accept to share with the info
10. You obtain the token (it is in the URL after “access_token=”)
11. Before using Instagram in your ABCApp, you need to add at least a picture in your Instragram account.
12. Paste your CLIENT-ID and your ACCESS TOKEN in your Editor, in Settings > APIs.
Author: Dominik
Last update: 2017-05-11 16:57
Here is how to proceed.
1. You need a Facebook user account
2. Go at https://developers.facebook.com/
3. Click on “Apps” and “Add a New App”
4. Enter a name for your Facebook app (you may choose a name that refers to your platform, like “Apps Maker Company”). This name will be shown to the app users when they would want to create an account in the mobile app through Facebook connect.
5. Choose “Communication” for the app category, and click on “Create App ID”:

6. Choose “Facebook Login” in the list by clicking on “Get Started”:

7. And set the settings like this (change “yourabcappdomain” by the URL to your ABCApp):
(We recommend you to set both “http” and “https” address, and so 6 entries)

8. From the left menu, click on “Settings”
9. In the App Domains field, let it blank.
10. Click on +Add Platform and choose “Website”
11. In the Site URL field enter the address of your platform (aka your ABCApp) and this time with “http://”, and “www.” if your platform is on your main domain. If it’s on a subdomain, enter your subdomain like http://apps.mydomain.com. Enter also the URL to your domain name, and http://*.yourdomain.com (if your ABCApp is at apps.abcapp.org enter http://*.abcapp.org”. Then save.
(We recommend you to set both “http” and “https” address, and so 6 entries)

2. You can also add an app icon for your app. It’s not mandatory but your Facebook app will be more professional with an icon when the user will be invited to connect with his Facebook account. Click on Save Changes.
13. From the left menu, click on App Review
14. Switch “Make My ABCApp app public?” to “yes”
15. From the left menu, click on Settings. Copy and paste your App ID and App secret, in your ABCApp Settings > APIs.
17. You’re done!
Author: Dominik
Last update: 2017-05-11 17:21
API keys used to display the images from the account of a specific user. You have to be connected under this Flickr account when you create the Flickr API keys.
From the left menu, click on Settings. Copy and paste your Flickr API Key and Flickr API secret, in your ABCApp Settings > APIs.
You’re done!
Author: Dominik
Last update: 2017-05-11 17:25
Hi Timothy,
The ABC app is free.
Only one advertising banner will be displayed at the bottom.
greeting
Dominik
Author: Dominik
Last update: 2017-08-02 10:03
it is necessary to enter the address, you will receive for free high quality app.
Author: Dominik
Last update: 2018-02-16 09:15
Editor -> Design and Application
Choose your homepage image and Startup image
Author: Dominik
Last update: 2018-03-30 16:41
Please register here
https://apps.abcapp.org/
Author: Dominik
Last update: 2018-11-05 15:45
Please register here:
Author: Dominik
Last update: 2018-05-03 11:21
here
Author: Dominik
Last update: 2018-05-03 11:23
ai, apk, avi, bmp, csv, doc, docx , gif, html, jpeg, jpg, json, m4a, m4v, mov, mp3, mp4, mpg, ogg, pdf, pem, pks, png, ppt, pptx, psd, pub, rtf, txt, wma, xls, xlsx, xml, yaml, yml
Author: Dominik
Last update: 2018-10-01 08:34
First of all, your clients need to have a domain name. If they do not have one yet, they can purchase one, for example at ovh.com. A .com name costs some € 5 / year. They are not required to purchase hosting service with their domain name.
Then, they must have access to the DNS zones from the domain name management interface. DNS means Domain Name System. Don’t worry, this is not too technical. They will usually find the DNS zones in the Domain section of their domain admin panel. When they find that section, they have to create a type CNAME or CNAME record. In this record they will have to enter the following info:
domain name: their subdomain
address: the address of your editor (for example, apps.yourdomain.com, if your platform is installed on a subdomain, or yourdomain.com if your platform is installed on a main domain)
Here is an example of how it could look like (it depends on the domain admin panel):.png)
Your clients can either choose to use their domain name exclusively as a white-label interface, or choose a subdomain (this is an example of the format: subdomain.mydomain.com). They have to enter the name of their domain or subdomain. If they have the option, they should set the TTL to the minimum value. If they don’t have this option,they should not worry. It just helps their modifications to be taken into account more quickly.
To finish, they must connect to their account on your platform. Then they have to enter their domain name. If they are using the domain for their white label admin panel, they must enter their domain name; if they are using a subdomain, they have to enter that name. If the CNAME has not been configured correctly, they will receive an error message.
Then they must not forget to customize their admin panel by clicking on this icon on the right of the general menu at the top:
Please note also that the customizations you make with this process will only appear at their white label editor address, and not on your platform, that’s why you may notice that the changes disappear when you close the customization panel. These changes are saved to be displayed at the address of their white label editor.
If they were able to set the TTL to the minimum value, they should be able to access their white-label interface immediately by typing the name of their domain or subdomain into their web browser. If not, they should be able to access it within 24h.
Then, once they have built the application of their first client, they should create an access to the application for him and give him the link to their white label panel. Thanks to this his client will be able to manage his app on your client’s admin without knowing he is using your platform.
Author: Dominik
Last update: 2018-11-05 10:57